![]() THIS SERVICE IS UNDER CONTRUCTION
THIS SERVICE IS UNDER CONTRUCTION
This service will be online later
USER GUIDE
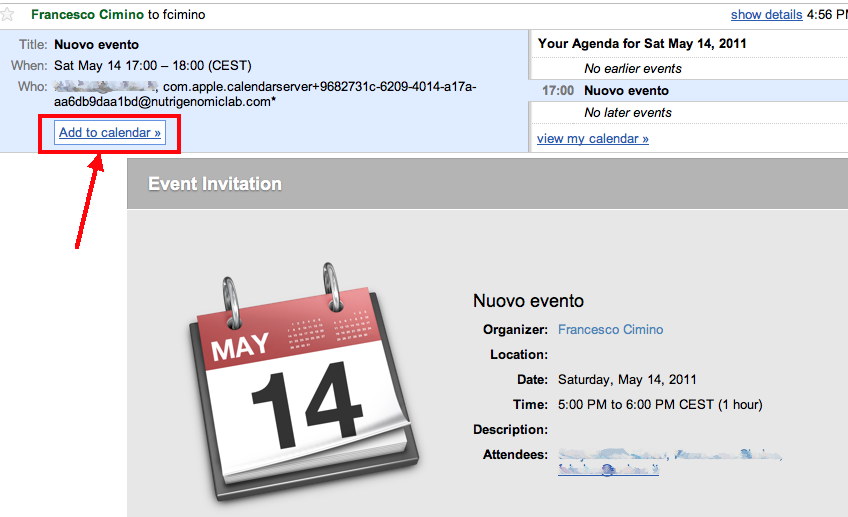
If you possess a Gmail account, you can save your invite into your Google Calendar. When an invite was sent (or cancelled), you will receive an email.

Click on that email and the invite will appear

Click on “add to calendar” and the invite will be added to your Google calendar. You can also setup your availability for that event!
In order to invite someone to an event, you have to access to calendar section on Website

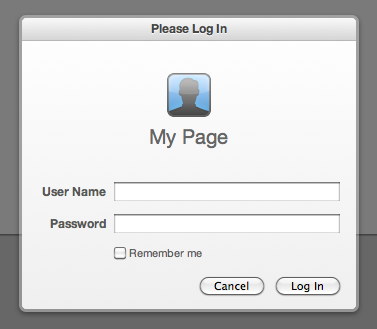
Use your login and password

Your Calendars will appear. Click on a day you want to create invite:

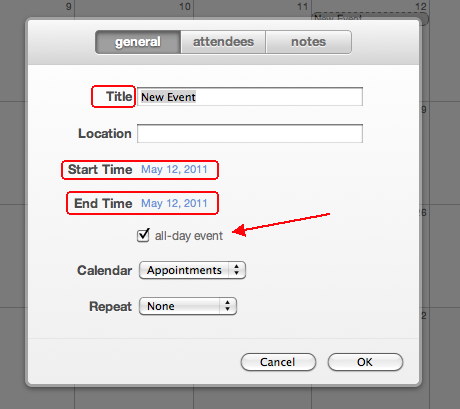
A pop-up window will appear. Insert your informations like “title of the event”, starting and ending time; you can decide also if the event is “all-day event” (see red arrow)

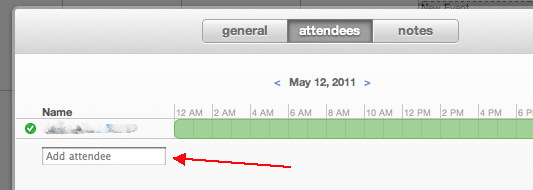
Then click on attendee if you want to invite someone to that event. If the attendee is a member of the lab, you have just to write the name or surname and a popup with the name will appear. If attendee is not a member of the Lab, you have to write the email address. An Email will be sent to the attendee. Then click ok.

The event will appear on your calendar scheme. The color of the event reflect the calendar you choose (on the left side the calendar have different color). You can create newer one or change color or name.

Please, remember to log-out when you have finished.

____________________________________________________________
1) Tap on the “Settings”
2) Tap on “Mail, Contacts, Calendars”
3) Tap “Add Account…”
4) Tap on “Add CalDAV Account” under “Calendars”
5) Enter your Server Name – (www.nutrigenomiclab.com) above – and your username and password .
6) Enter the Description – that will be how your Calendar will show on the app, so choose that based on what makes sense for you.
7) Hit “New” – Accept any messages about certificates, and ignore any messages that say that your request failed.
8) Tap on the “Advanced Settings…” and you’ll get a screen like below.
9) turn “Use SSL” ON.
10) Enter the port number (8443) under “Port”
11) Under account URL, scroll to the left and replace “user” with your username. The full URL should say “http://[servername]:[port]/principals/users/[your username]” Your URL may say “https” if your server uses SSL.
12) Tap the arrow back and try to add the Calendar again. This time it should verify.
13) Go back to Home and view your Calendar on your iPhone. You should now be able to select the calendar from your list of Calendars.